

Workflows
Workflows are a more flexible and powerful alternative to triggers. A trigger's logic is straight-line and static. Workflows let you build complex, branching logic out of nodes connected to each other.
An example trigger:
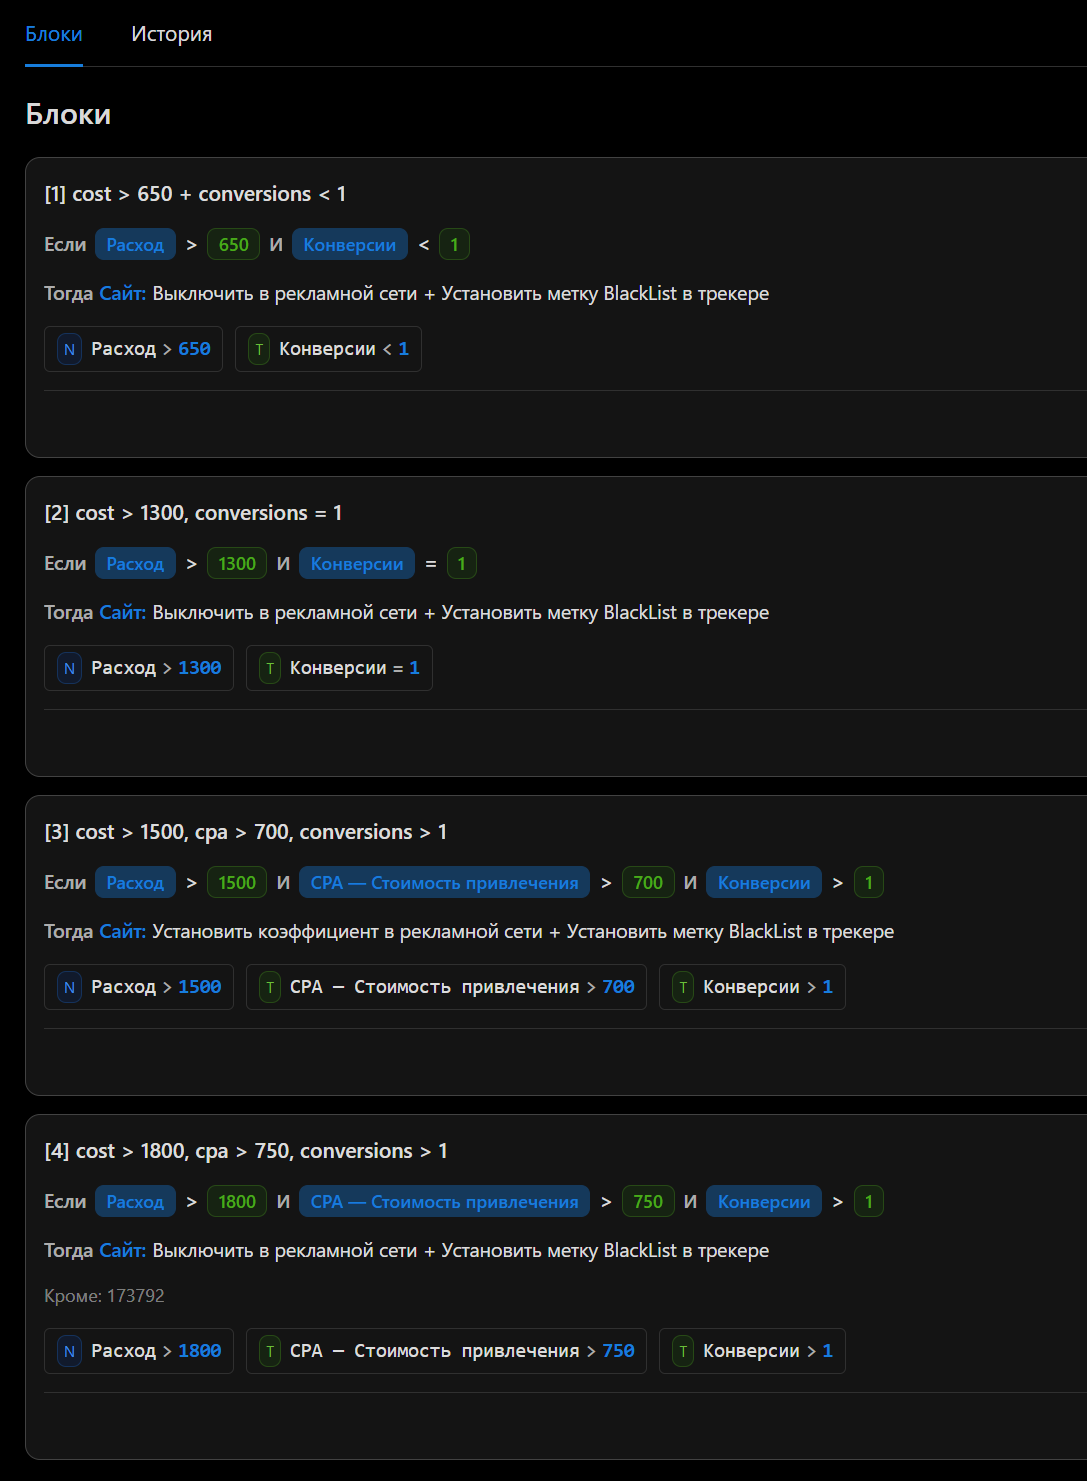
The same trigger as a graph:
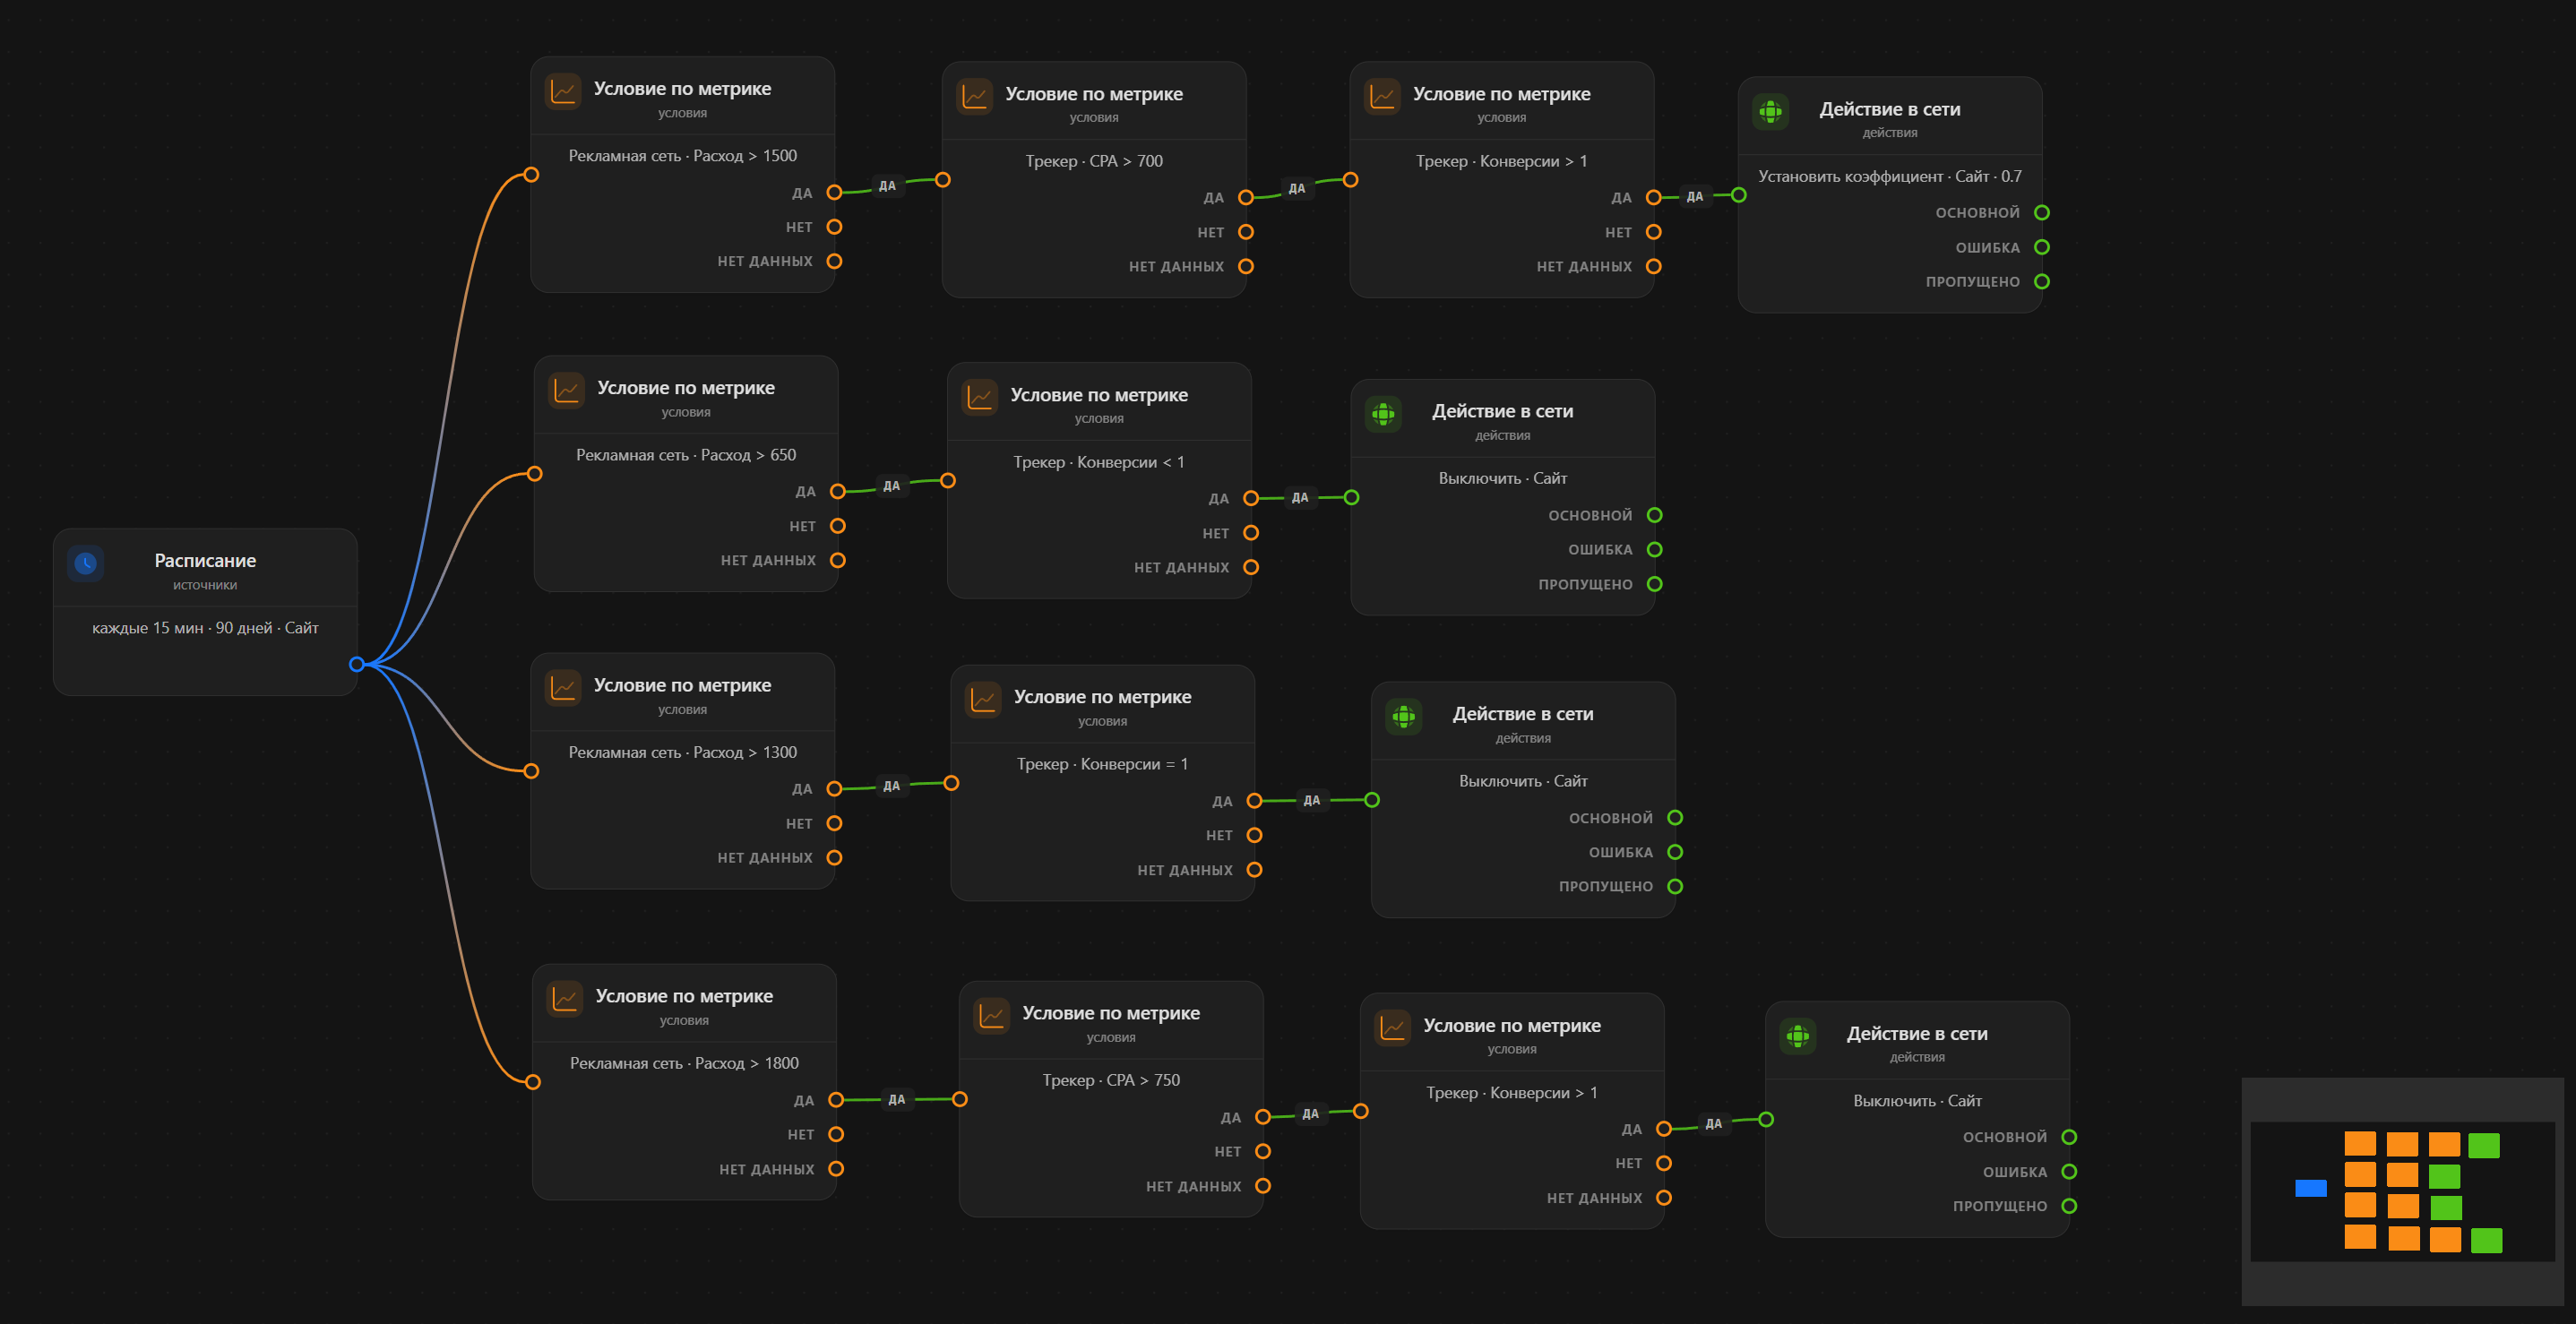
Every little square is a node. Each node does its own job and has its own settings.
The list of available nodes:
Sources
- Schedule
Conditions
- Group Comparison
- Data Quality
- Comparison with the Past
- Flow Check
- Action Impact
- Metric Condition
- Appearance / Disappearance
- Switch (Escalation)
- Metric Trend
Actions
- Ad Network Action
- Notification
- Tracker Action
Transformations
- Action Limit
- Flow Aggregate
- Object Filter
- Refresh from Snapshot
- Top / Bottom
Flow
- Branch Merge
- Wait
How to Read the Graph
An object flow travels along the arrows between nodes — a set of objects (what an object is) together with statistics from the ad network and the tracker. Each node receives the flow as input, does something with it, and passes it on through its outputs.
Most condition nodes have three outputs:
- true — objects for which the condition was met
- false — objects for which the condition was evaluated but not met
- no_data — objects for which the condition could not be evaluated (no metric value, not enough history, etc.)
INFO
Separating false from no_data is not pedantry — it's precision. An object with no conversions and an object with a CPA below the threshold are two very different things. The first goes to no_data, the second to false. In triggers they were indistinguishable; in workflows you decide what to do with each one (for example, hang a notification on no_data).
You can connect the next node to an output, or leave it empty — the branch simply ends there. The reasons objects land in no_data are always visible in the run details on the results page.
Let's go through each node in detail.
Sources
Schedule
Details
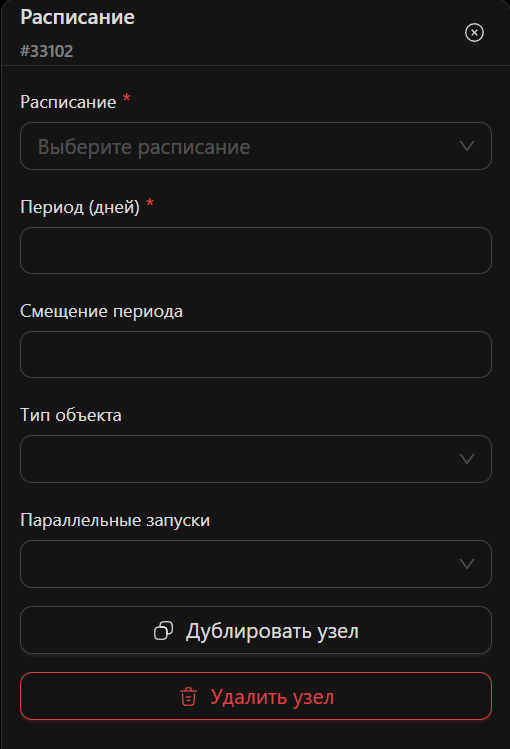
The entry point of a workflow. Starts the workflow on a schedule and loads statistics for the selected period. Everything that happens next happens to the data this node loaded.
Fields:
- Schedule — the workflow's run interval. Works the same as the trigger schedule: the more often it runs, the less of your budget bots and fraudsters manage to burn.
- Period (days) — how many days of statistics to pull. A full analog of the trigger time period. The maximum is specific to each ad network.
- Period offset — shifts the statistics window back from "today" by a number of days. Why you'd need this is explained in detail in the triggers' offset section.
- Object type — campaign / ad / site (some networks also have ad group and others). Determines exactly what the entire workflow will analyze and process: every node further down the graph works with objects of this type.
- Parallel runs — what to do when it's time for a new run but the previous one is still working:
- Skip tick while a run is alive — the new run doesn't start; wait for the next scheduled slot. The default and safest option.
- Allow parallel runs — runs execute simultaneously. Careful: two parallel runs can perform actions on the same objects at the same time.
- Cancel the previous run — the old run is cancelled and the new one starts. Useful when fresh data always matters more than unfinished work.
- Queue the tick — the new run waits for the current one to finish and starts right after it (only one run fits in the queue).
INFO
When can a previous run still be "alive"? For example, when the workflow contains a wait node of half an hour and the schedule is every 15 minutes.
Conditions
Group Comparison
Details
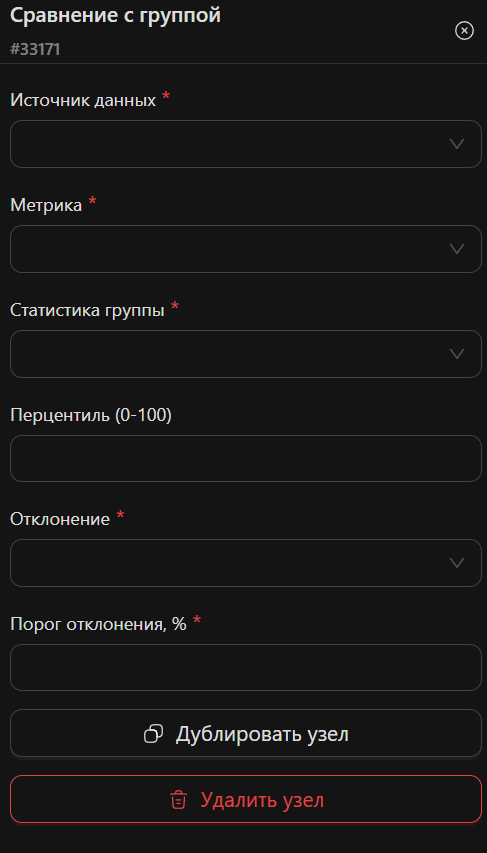
Compares each object against its own group. Use case: "disable a placement whose CPA is 70% above the campaign median". No need to hand-pick a threshold in absolute numbers — it floats along with the campaign.
INFO
The group is all objects in the selected source's statistics (the whole campaign for the period), not the flow narrowed down by previous nodes. Even if only 3 objects reached this node, they'll be compared against the entire campaign.
Fields:
- Data source — where to take the metric from, the ad network or the tracker. Which is better for what — see trigger conditions.
- Metric — the metric to compare. The set depends on the data source.
- Group statistic — what we compare the object against:
- Mean — the arithmetic mean of the group. Sensitive to outliers: one anomalous site will shift the baseline.
- Median — the middle of the group. Robust to outliers; usually the best choice for CPA/ROI.
- Percentile — an arbitrary point of the distribution. For example, P75 by cost is the boundary of the "expensive quarter".
- Percentile (0-100) — which percentile to compute. Filled in only when the "Percentile" statistic is selected.
- Deviation — which direction of deviation to look for:
- Above the group — the object is worse/higher than the group (for CPA, cost)
- Below the group — the object is below the group (for ROI, CR)
- Deviation threshold, % — how many percent the object must deviate from the group baseline to go to true.
Outputs: true — deviated by the threshold or more, false — evaluated but within normal range, no_data — the object has no metric value (or the group baseline is zero).
Data Quality
Details
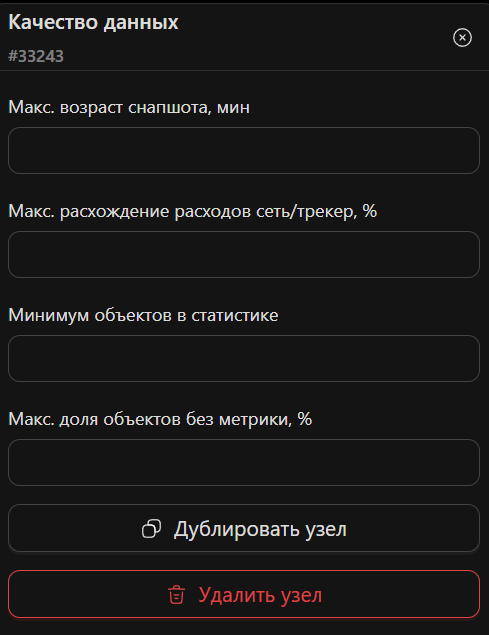
A safety gate: checks that the data can be trusted at all BEFORE the workflow starts disabling things. Use case: the ad network went down or is returning empty statistics — without this node the workflow may cheerfully disable "underperforming" sites whose conversions simply failed to load.
Each check is optional, but at least one must be filled in:
- Max snapshot age, min — how fresh the latest loaded statistics for the binding must be. If the data is older, the check fails.
- Max network/tracker cost discrepancy, % — compares total costs from the ad network and from the tracker. Costs never match exactly, but if the discrepancy is anomalously large, something is broken (a dropped postback, a lost cost tag).
- Minimum objects in statistics — if the network returned suspiciously few objects (usually 500 sites, and suddenly 3), the data is clearly incomplete.
- Max share of objects without a metric, % — what percentage of objects may lack a value for the selected metric. When this check is selected, you additionally specify the data source and the metric to check for gaps.
Outputs: true — the data is usable, carry on; false — checks failed, the list of problems is saved in the run details.
INFO
The right wiring: hang the working logic (conditions and actions) on true, and a notification node on false. Then when the data has problems, the actions simply won't run — and you'll get a message about exactly what went wrong.
Comparison with the Past
Details
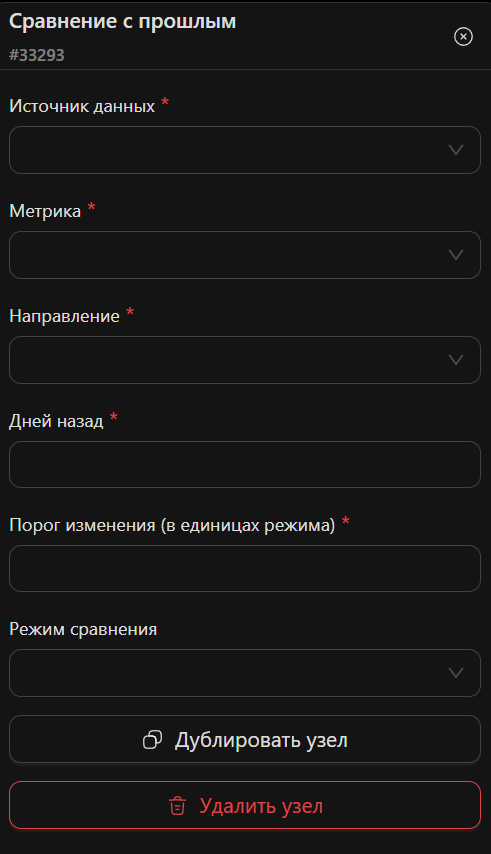
Compares the current metric value with its value N days ago. Use case: "the campaign's ROI dropped 30% compared to last week — lower the bid and tell me".
Fields:
- Data source — the ad network or the tracker.
- Metric — what we compare.
- Direction — which change to look for:
- Increased — the metric grew by the threshold or more
- Decreased — the metric fell by the threshold or more
- Changed — a shift in either direction by the threshold or more
- Days ago — which point in the past to compare against (the window there will be the same length as the current one).
- Change threshold (in the mode's units) — the magnitude of change at which the object goes to true. Which units depends on the comparison mode below.
- Comparison mode — how to measure the change:
- Relative change, % — classic percentages, the default mode. A threshold of 30 = "changed by 30%".
- Absolute change — the difference "now minus then" in the metric's own units. Indispensable for profit and ROI, which can cross zero (percentages of zero are mathematical pain).
- Percentage points — the same difference, but for percentage metrics. "CTR dropped by 0.3 pp" sounds more honest than "CTR fell 30%" at a CTR of 1%.
- Times — a multiple. A threshold of 2 = "grew at least twofold" (or fell at least twofold, for the "Decreased" direction). The threshold cannot be below 1.
INFO
Why so many modes? Metrics near zero produce meaningless percentages: CTR 0.01 → 0.02 is formally "+100%", though in reality nothing happened. Pick the mode to match the metric: money and volumes — percentages, ROI/profit — absolute, CTR/CR — percentage points.
Outputs: true — the change passed the threshold, false — evaluated, but the threshold wasn't passed, no_data — no current value or no point in the past (history accumulates from the moment workflows start running on the binding; on publish, missing history is backfilled automatically).
Flow Check
Details
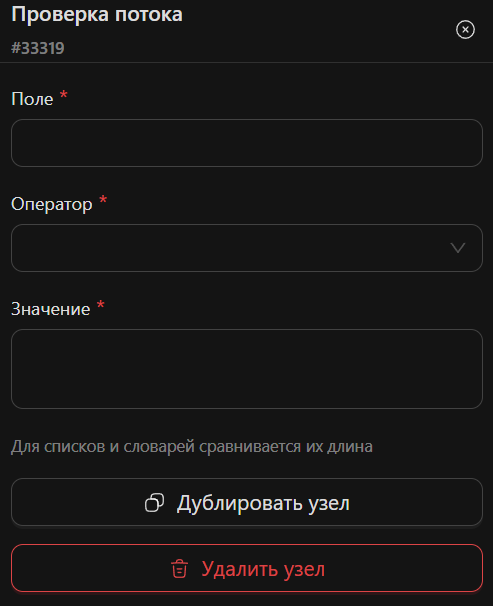
A simple condition on an arbitrary flow field. Unlike the other conditions, it works not with objects individually but with the flow as a whole: the entire flow goes either to true or to false. Use case: "if more than 20 objects are left after filtering — don't disable, call a human" (paired with the flow Aggregate node).
Fields:
- Field — a dot-separated path to a flow field. The most useful ones:
selection.matched_objects— the flow's current set of objects (compared by count)metadata.aggregate.value— the result of the flow Aggregate nodestats.network/stats.tracker— source statistics (by row count)
- Operator — equals / not equals / greater than / less than.
- Value — what to compare against.
INFO
For lists and dictionaries, their length is compared. So the condition selection.matched_objects greater than 5 means "the flow contains more than 5 objects".
Outputs: true / false — the entire flow, unchanged.
Action Impact
Details
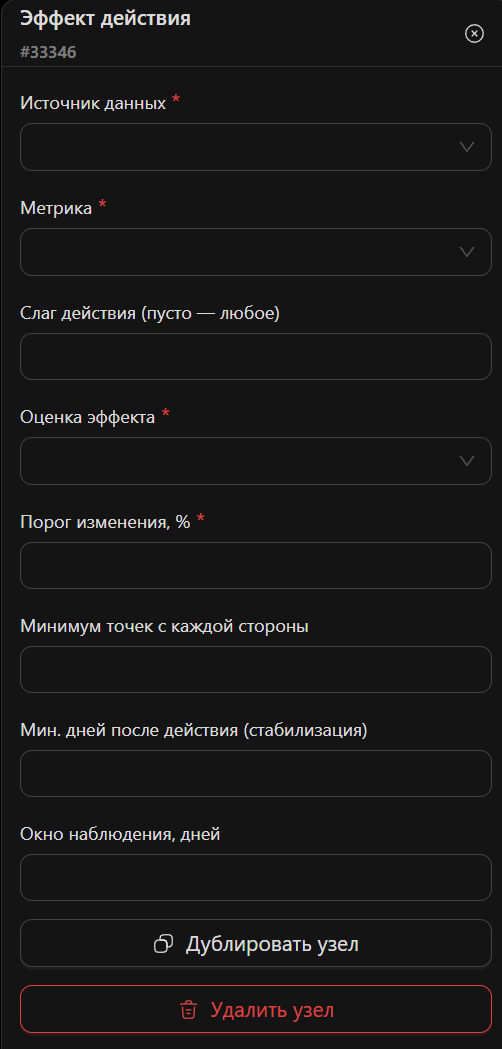
Answers the question "did what we did actually help?". It finds the last executed action on the object, splits the metric's history into "before" and "after" (the day of the action itself is excluded as mixed), and compares the averages. Use case: "if CPA still hasn't improved after the bid decrease — disable the placement entirely".
Fields:
- Data source — the ad network or the tracker.
- Metric — which metric to evaluate the impact on.
- Action slug (empty = any) — evaluate the impact of a specific action (e.g.
set_coeff) or of the last action, whatever it was. - Impact evaluation — what counts as the result:
- Improved — the metric moved in the good direction. The node knows the polarity itself: for cost, CPA and CPC "better" means "lower", for everything else — "higher".
- Worsened — the metric moved in the bad direction.
- Changed — a shift in either direction.
- Change threshold, % — how many percent the "before" and "after" averages must differ.
- Minimum points on each side — how many days of statistics there must be both before and after the action for the comparison to make sense (default 2).
- Min. days after the action (stabilization) — don't evaluate the impact until this many days have passed since the action. Auctions don't rebalance instantly — let the change do its work.
- Observation window, days — the depth of history around the action (default 14).
Outputs: true — there's an impact and it passed the threshold, false — the impact was evaluated but didn't reach the threshold, no_data — there was no action, too few points on one side, stabilization is in progress, or another action followed the one being evaluated (the impact is already "contaminated" — it can't be measured honestly).
INFO
The action doesn't have to be performed by this same workflow — actions from any of your triggers and workflows on this binding are taken into account.
Metric Condition
Details
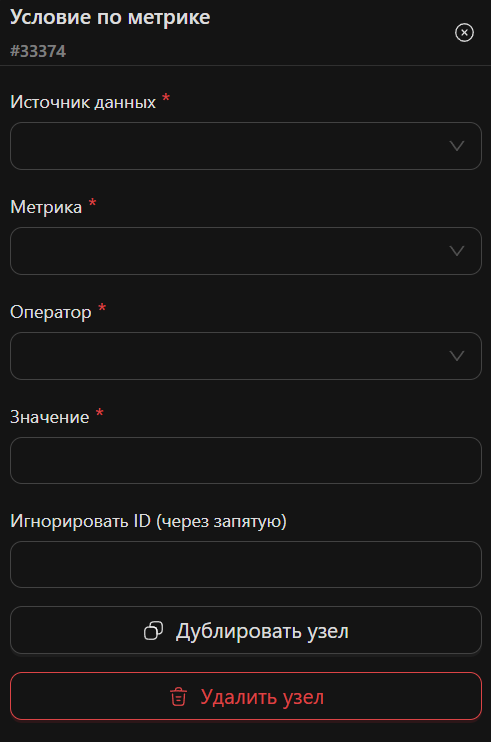
The workhorse — a direct analog of the trigger condition. Checks each object's metric against a threshold.
Fields:
- Data source — the ad network or the tracker. What to take from where.
- Metric — the set depends on the source and the specific ad network / tracker.
- Operator — equals / not equals / greater than / less than.
- Value — an integer or a floating-point number.
- Ignore IDs (comma-separated) — objects on this list become invisible to the node and land in no output at all. An analog of the ignore list in trigger blocks.
Outputs: true — the condition is met, false — the metric exists but the condition isn't met, no_data — the object has no value for this metric.
DANGER
Just like with triggers — mind the ad network's currency.
Appearance / Disappearance
Details
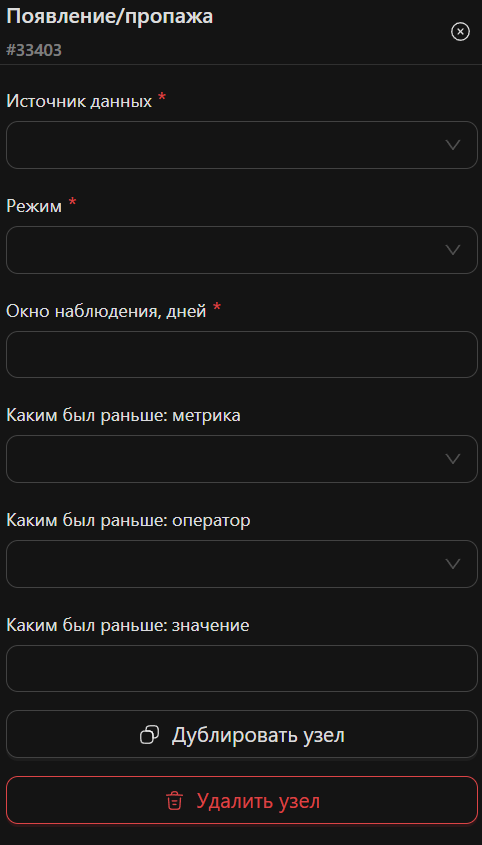
Watches the composition of the statistics: which objects appeared for the first time and which ones vanished. Appearance use case: "a new site entered the campaign — send a notification before it eats the budget". Disappearance use case: "a site that reliably brought profit dropped out of rotation — time to investigate".
Fields:
- Data source — the ad network or the tracker.
- Mode:
- Appeared — the object is in the current statistics but wasn't seen within the observation window.
- Disappeared — the object was in the history but is absent from the current statistics.
- Observation window, days — how many days of history count as "the past".
- What it used to be: metric / operator / value — an optional qualifier: a condition on the metric's average historical value. Fill in either all three fields or none. Example: "was profitable and disappeared" = metric profit, operator greater than, value 0.
Outputs: true — the appeared/disappeared objects (that passed the qualifier, if one is set), false — the remaining objects, no_data — a candidate with no historical values for the qualifier metric.
INFO
This node should sit right after the schedule. A disappeared object physically isn't in the current statistics — any condition on current metrics placed above will filter it out, and it will simply never reach this node.
Switch (Escalation)
Details
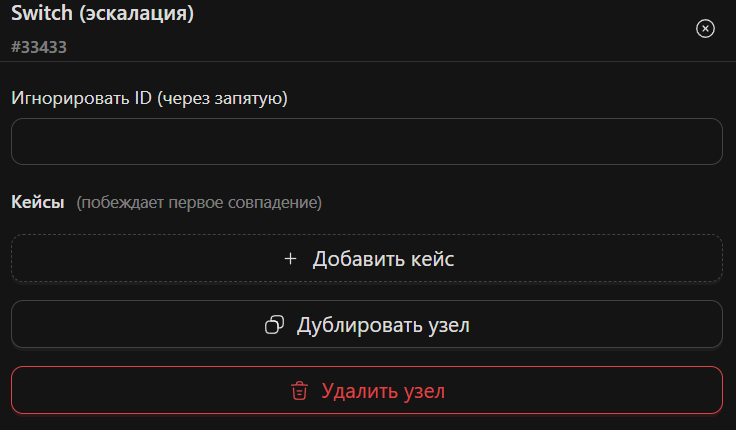
Several conditions with priority: an object goes to the output of the FIRST matching case and doesn't participate in the rest. Use case: a blacklist ladder — "cost > 50 with no conversions → disable; cost > 20 → cut the coefficient; cost > 10 → notify". With triggers you'd have to pile up three parallel blocks, and an object could fire in all three at once.
Fields:
- Ignore IDs (comma-separated) — these objects don't participate in any case.
- Cases — an ordered list. Each case is:
- a set of conditions (data source / metric / operator / value — as in the metric Condition), combined with AND — objects that match all of the case's conditions at once will fire;
- its own node output, to which its own branch of actions is connected.
Objects that match no case go to the default output.
INFO
Case order decides everything: put the strictest conditions (the highest thresholds) first, otherwise a softer case will snatch objects before the strict one gets a chance.
Metric Trend
Details
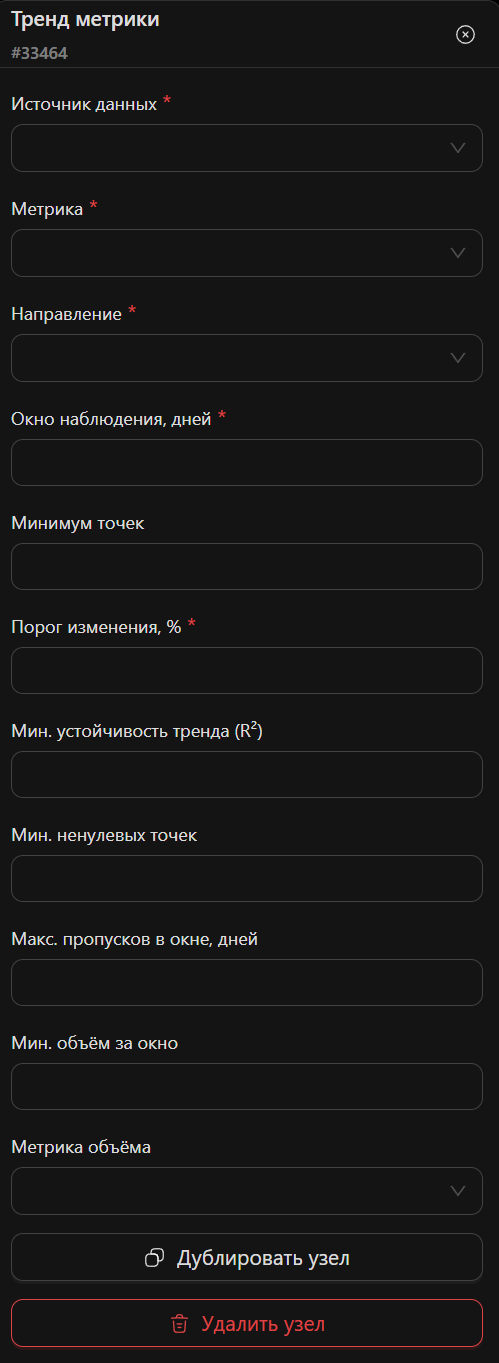
Catches a sustained movement of a metric over time, not a one-off spike. A linear regression is fitted over the series of daily values — noisy up-and-down seesaws don't count as a trend. Use case: "a placement's CR has been sliding down for a week — turn it off before it slides to zero".
Fields:
- Data source — the ad network or the tracker.
- Metric — what to look for a trend in.
- Direction:
- Decline — the metric is steadily falling
- Growth — the metric is steadily growing
- Observation window, days — the depth of the series (3 to 45 days).
- Minimum points — how many days with a metric value are needed for the calculation (default 3). Gaps in the series are allowed.
- Change threshold, % — how many percent the metric must change over the window (along the trend line) for the object to go to true.
- Min. trend stability (R²) — a noise filter from 0 to 1. R² shows how well the points fit a straight line: 1 is a perfect line, near 0 is chaos. Values of 0.5–0.7 cut off most random seesaws.
- Min. non-zero points — how many days with a non-zero value the series must contain. Protection against "trends" on series of zeros with a couple of blips.
- Max gaps in the window, days — how many days without data are allowed. More than that — the object isn't evaluated.
- Min. volume over the window + Volume metric — the minimum total traffic volume over the window (the default volume metric is impressions). "CTR dropped 30%" on 20 impressions isn't a trend, it's statistical dust.
Outputs: true — a sustained trend in the required direction with a change at or above the threshold, false — the trend was computed but didn't qualify (including an unstable one, with R² below the gate), no_data — too few points, too many gaps, too little volume, or a zero in the calculation base.
INFO
For trend nodes it's best to set a 1-day period in the schedule: then every point in the series is a separate day. With an N-day period, points turn into rolling N-day sums and the trend gets smoothed out.
Actions
Ad Network Action
Details
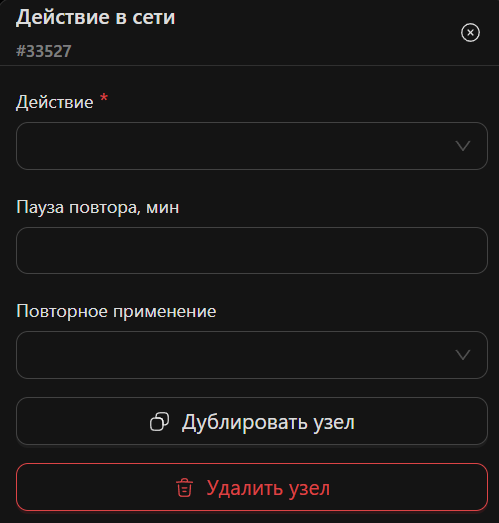
Performs an action in the ad network on all objects that reached the node. The set of actions is the same as in trigger blocks: enable, disable, set price, set coefficient, etc. — depending on what the specific ad network supports.
Fields:
- Action — what to do. For actions with a parameter (set price / coefficient), a value is entered additionally.
- Repeat pause, min — the minimum interval between repeated actions on the same object. Protection against "flapping", when an object teeters on the edge of a condition and the workflow yanks it on every run.
- Reapplication:
- Skip already applied — if the action has already been performed on the object and nothing has changed since, don't perform it again. The default option: don't hammer the network's API with identical requests.
- Always execute — perform it on every match. Rarely needed, for example when someone keeps re-enabling the object by hand.
Outputs: main — the whole flow moves on (each object's status is saved in the run details), failed — objects where the action failed (hang a notification here and you'll be the first to know about the network's API problems), skipped — objects skipped due to the repeat pause or the reapplication policy.
Notification
Details
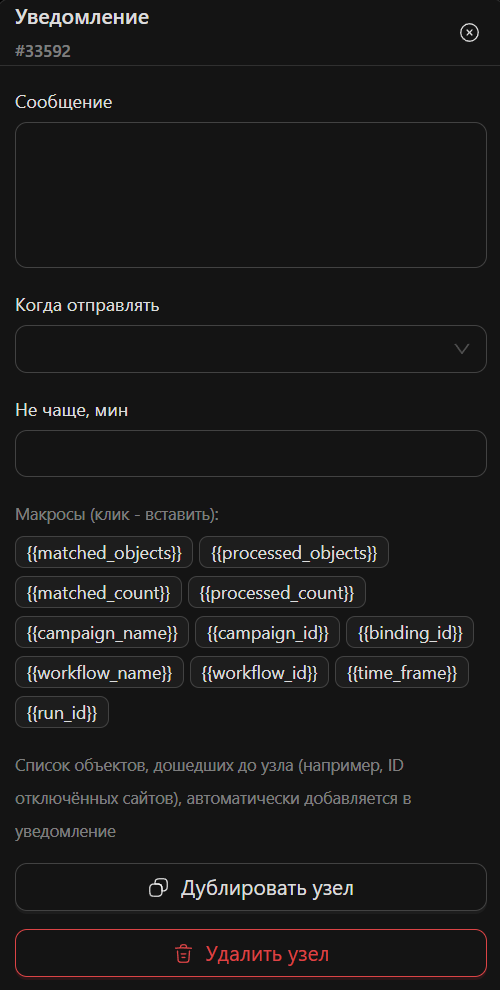
Sends a message to your notification channels. The list of objects that reached the node (for example, the IDs of disabled sites) is added to the message automatically.
Fields:
- Message — the text. Macros are supported (clicking a button on the form inserts the macro into the text):
{{matched_objects}}— the matched objects as a list{{processed_objects}}— the processed objects as a list{{matched_count}}/{{processed_count}}— the number of matched / processed objects{{campaign_name}}/{{campaign_id}}— the campaign name and ID{{binding_id}}— the binding ID{{workflow_name}}/{{workflow_id}}— the workflow name and ID{{time_frame}}— the statistics period in days{{run_id}}— the run ID
- When to send:
- Objects or text present — the default option: send if there are objects or the message is non-empty.
- Only when there are objects — silence while the flow is empty. Saves you from "Check complete, 0 objects" messages every 15 minutes.
- Always — send on every run. Good for heartbeat monitoring that the workflow is alive at all.
- No more often than, min — throttling: no more than one message from this node per the specified window. Suppressed sends are marked in the run details.
INFO
No more than 50 objects make it into the list, and the message length is capped at 3500 characters — Telegram isn't made of rubber.
Tracker Action
Details
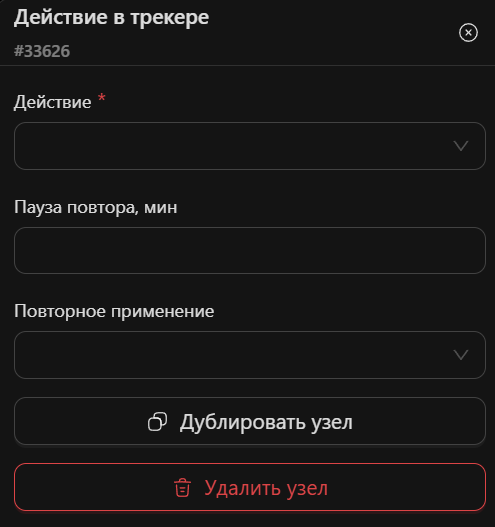
Performs a tracker action on the flow's objects. As with triggers, tracker actions are cosmetic — BlackList/WhiteList tags and the like — but with them, the workflow's results are visible right in the tracker's reports.
Fields:
- Action — what to do; the set depends on the tracker.
- Repeat pause, min — same as in ad Network Action.
- Reapplication — same as in ad Network Action: Skip already applied (default) or Always execute.
Outputs: main / failed / skipped — the same as in Ad Network Action.
Transformations
Action Limit
Details
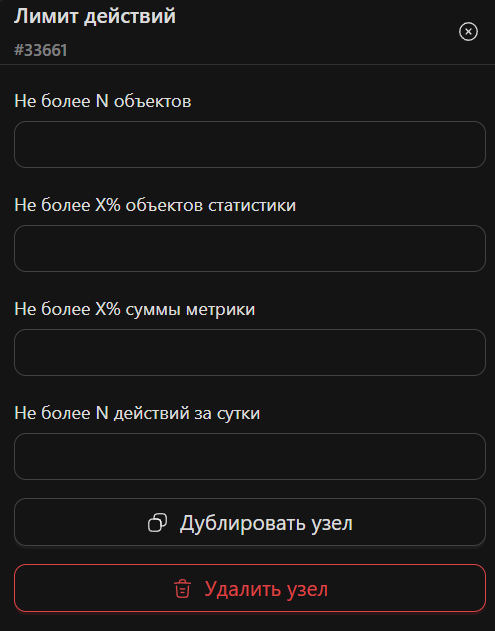
A fuse that goes BEFORE an action node and caps the blast radius. Use case: the condition is misconfigured or the data came in broken — without a limit, the workflow will blacklist half the campaign in a single run. With a limit, it disables 5 sites; you'll see the rest in the run details and make the call yourself.
Each limit is optional, but at least one is required. If several are set, the strictest one applies:
- No more than N objects — a hard ceiling on the number of objects per run.
- No more than X% of statistics objects — a ceiling as a share of all objects in the campaign. Handy when the number of sites in a campaign fluctuates.
- No more than X% of the metric total — a ceiling as a share of the metric's total (when selected, you specify the source and the share metric, usually cost). "Don't disable sites worth more than 20% of the campaign's cost at once".
- No more than N actions per day — the workflow's daily action budget. Actually executed actions over the last 24 hours are counted.
When trimming, the most "pronounced" objects stay in the flow — the ones with the strongest value of the last condition's metric. Dropped objects are saved in the run details and are available to the notification node.
Flow Aggregate
Details
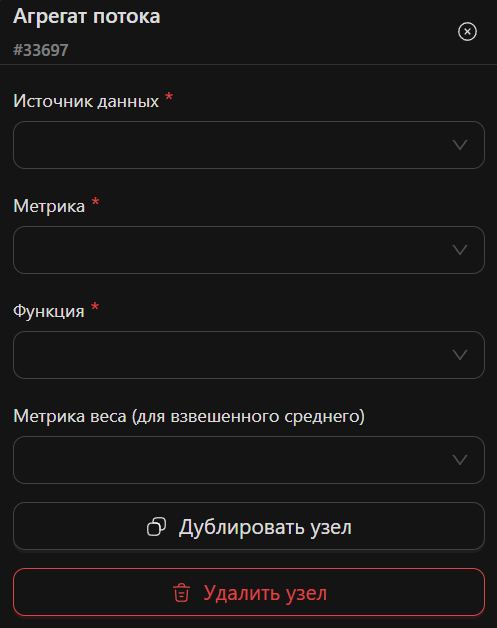
Computes a single number over the entire flow and puts it into the flow. It makes no decisions itself — the decision is made by the flow Check node that follows it, via the metadata.aggregate.value field. Use case: "if more than 20 sites are up for disabling at once — that's suspicious; don't disable, send a notification instead".
Fields:
- Data source — the ad network or the tracker.
- Metric — which metric to compute over.
- Function:
- Object count — how many objects are in the flow
- Sum — the sum of the metric over the flow
- Mean — the arithmetic mean
- Weighted mean — a mean weighted by another metric. For example, average CPA weighted by cost: expensive placements matter more.
- Median — the middle of the distribution, robust to outliers
- Minimum / Maximum — the extreme values
- Percentile — an arbitrary point of the distribution (a percentile 0-100 is additionally specified)
- Share of passed objects — the flow's objects as a share of all objects in the statistics. "80% of sites matched the condition" — the problem is probably not the sites but the data.
- Weight metric (for the weighted mean) — which metric to weight by (default: cost).
Output: main — the flow unchanged, plus the computed aggregate.
Object Filter
Details
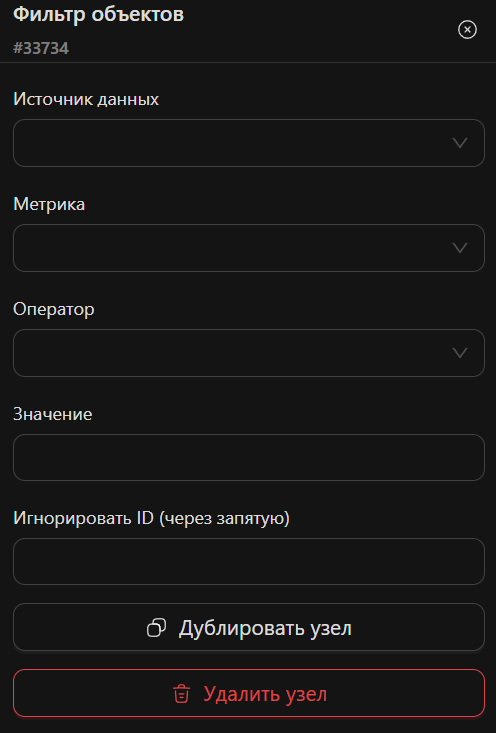
Narrows the flow: only objects that match the condition pass through. Unlike the metric Condition, it doesn't split objects across outputs — it simply drops the ones that don't match. Handy as a preliminary sieve. Use case: "only let through sites with cost above 0" — so the heavy conditions below don't churn through empty shells.
Fields:
- Data source / Metric / Operator / Value — a metric condition, as in the metric Condition. Fill it in entirely or not at all.
- Ignore IDs (comma-separated) — exclude the listed IDs from the flow. Can be used without the metric condition too — then the node works as a pure ignore list.
Output: main — the narrowed flow (it may end up empty, in which case the nodes below run idle with no actions).
Refresh from Snapshot
Details
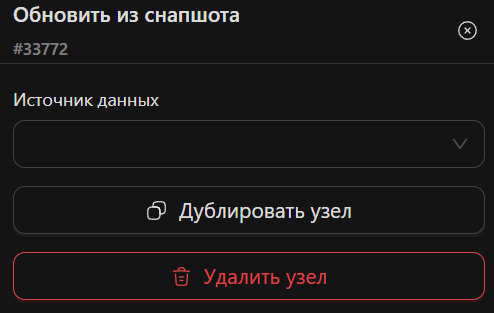
Refreshes the statistics in the flow from the latest saved data — WITHOUT calling the ad network or the tracker. Use case — paired with wait: set a coefficient → waited → refreshed the statistics → checked the metric. Without this node, the condition after the pause would see the data as it was when the run started.
Fields:
- Data source — what to refresh: network / tracker / both (default: both).
Output: main — the flow with fresh statistics. The object selection made by previous nodes is preserved.
INFO
The data is only as fresh as the latest background statistics fetch for the binding — the node doesn't make the network recompute its statistics; it takes what has already been loaded.
Top / Bottom
Details
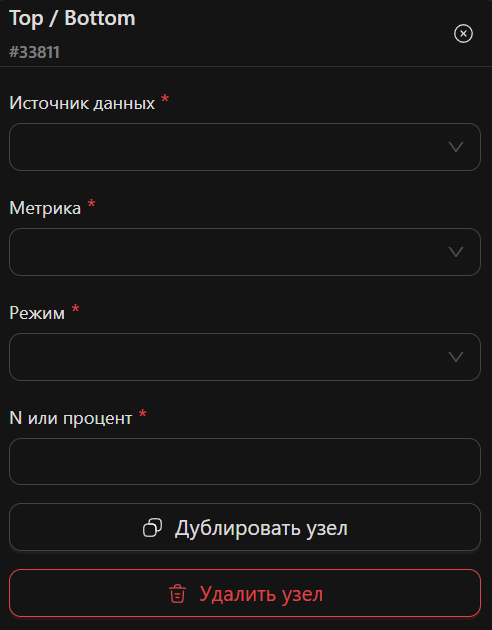
Selects the extreme objects by a metric. Use case: "show the top 5 sites by cost with no conversions" or "only work with the sites that account for 80% of the campaign's cost" — and leave the long tail alone.
Fields:
- Data source — the ad network or the tracker.
- Metric — what to sort by.
- Mode:
- Top N — the N objects with the highest value
- Bottom N — the N objects with the lowest value
- Top X% of objects — the top X% of objects by value
- Bottom X% of objects — the bottom X% of objects
- Contributing X% of the metric — the objects that together account for X% of the metric's total (the classic: the 20% of sites producing 80% of the cost)
- N or percent — a number for the Top/Bottom N modes, a percentage (up to 100) for the rest.
Output: main — the narrowed flow. Objects without a metric value don't take part in the selection and are dropped.
Flow
Branch Merge
Details
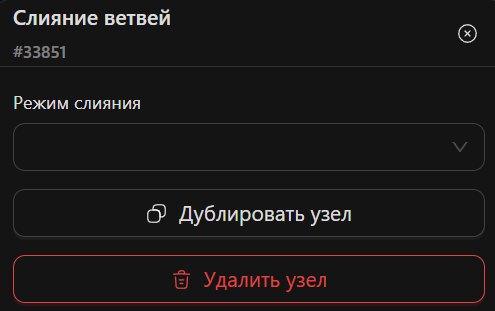
Brings several branches of the graph together into one. Waits for all incoming branches and merges their object sets.
Fields:
- Merge mode:
- Union — objects that arrived via at least one branch. For example, "disabled OR notified" — everything into one final summary.
- Intersection — only objects that arrived via ALL branches. The main use case: an object must pass two independent conditions at once, e.g. "CPA above the group median" AND "CR trend declining" — double confirmation before disabling.
Output: main — the merged flow.
INFO
The node waits for all connected branches. If some branch never reached it (its objects ran out at a condition above), the node is skipped — for intersection this is only logical: no branch, no intersection.
Wait
Details
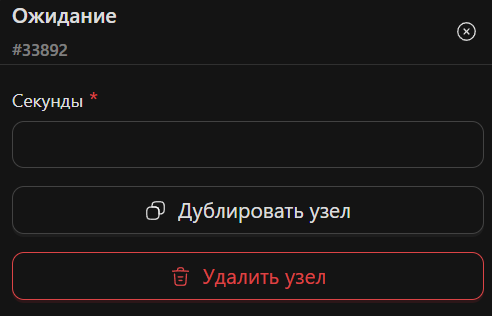
Pauses the branch. Use case: performed an action → waited → refreshed the statistics → checked what came of it.
Fields:
- Seconds — the pause duration. Maximum 86400 seconds (one day).
Output: main — the flow unchanged, just later.
INFO
The pause keeps the workflow run "alive" — don't forget about the parallel runs policy in the Schedule if the pause is longer than the run interval.